

This post was created using version 3.x.x of refine. Although we plan to update it with the latest version of refine as soon as possible, you can still benefit from the post in the meantime.
You should know that refine version 4.x.x is backward compatible with version 3.x.x, so there is no need to worry. If you want to see the differences between the two versions, check out the migration guide.
Just be aware that the source code example in this post have been updated to version 4.x.x.
In this article, we will create the e-commerce client of our Strapi-Multitenancy admin panel that we have done before.
It is now used headless with the refine 3 version. You can use any UI library you want with the headless feature.
We will use Strapi and Chakra-UI together with Next.js in our E-commerce client example application.
Refine Project Setup
Let's start by creating our refine project. You can use the superplate to create a refine project.
npm create refine-app@latest refine-ecommerce-example -- -p refine-nextjs -b v3
✔ What will be the name of your app · refine-ecommerce-example
✔ Package manager: · npm
✔ Do you want to using UI Framework? > No(headless)
✔ Data Provider: Strapi
✔ i18n - Internationalization: · no
superplate will quickly create our refine project according to the features we choose. Let's continue by install the refine Strapi-v4 Data Provider and Chakra-UI packages that we will use later.
Installation
cd refine-ecommerce-example

npm i @refinedev/strapi-v4 @chakra-ui/react @emotion/react@^11 @emotion/styled@^11 framer-motion@^6
Our refine project and installations are now ready! Let's start using it.
Usage
Configure Refine for Strapi-v4
import React from "react";
import { AppProps } from "next/app";
import Head from "next/head";
import { Refine } from "@refinedev/core";
import routerProvider from "@refinedev/nextjs-router";
import { DataProvider } from "@refinedev/strapi-v4";

const API_URL = "https://api.strapi-multi-tenant.refine.dev/api";

function MyApp({ Component, pageProps }: AppProps): JSX.Element {
    const dataProvider = DataProvider(API_URL);

    return (
        <Refine
            routerProvider={routerProvider}
            dataProvider={dataProvider}
        >
            <Component {...pageProps} />
        </Refine>
    );
}
Chakra-UI Provider Setup
import React from "react";
import { AppProps } from "next/app";
import Head from "next/head";
import { Refine } from "@refinedev/core";
import routerProvider from "@refinedev/nextjs-router";
import { DataProvider } from "@refinedev/strapi-v4";

import { ChakraProvider } from "@chakra-ui/react";

const API_URL = "https://api.strapi-multi-tenant.refine.dev/api";

function MyApp({ Component, pageProps }: AppProps): JSX.Element {
    const dataProvider = DataProvider(API_URL);

    return (
        <Refine routerProvider={routerProvider} dataProvider={dataProvider}>
            <ChakraProvider>
                <Component {...pageProps} />
            </ChakraProvider>
        </Refine>
    );
}
Create Strapi Collections
We created three collections on Strapi as store, product and order and added a relation between them. For detailed information on how to create a collection, you can check here.
We created our collections in the previous Strapi Multitenancy guide. Now we will use the same collections.
Refer to the Project Collections for detailed information. →
Create Refine Layout
refine headless is not affiliated with any UI. It is entirely up to you to customize your UI. Let's create a simple layout for this example.
The Layout we've created now will only show the refine logo. In the following steps, we will edit our Layout.
import { LayoutProps } from "@refinedev/core";
import { Box, Container, Flex, Image } from "@chakra-ui/react";

export const Layout: React.FC<LayoutProps> = ({ children }) => {
    return (
        <Box
            display={"flex"}
            flexDirection={"column"}
            backgroundColor={"#eeeeee"}
            minH={"100vh"}
        >
            <Container maxW={"container.lg"}>
                <Flex justify={"space-between"} mt={4} alignSelf={"center"}>
                    <a href="https://refine.dev">
                        <Image alt="Refine Logo" src={"./refine_logo.png"} />
                    </a>
                </Flex>
                {children}
            </Container>
        </Box>
    );
};
import React from "react";
import { AppProps } from "next/app";
import Head from "next/head";
import { Refine } from "@refinedev/core";
import routerProvider from "@refinedev/nextjs-router";
import { DataProvider } from "@refinedev/strapi-v4";

import { ChakraProvider } from "@chakra-ui/react";
import { Layout } from "src/components";

const API_URL = "https://api.strapi-multi-tenant.refine.dev/api";

function MyApp({ Component, pageProps }: AppProps): JSX.Element {
    const dataProvider = DataProvider(API_URL);

    return (
        <Refine
            routerProvider={routerProvider}
            dataProvider={dataProvider}
            Layout={Layout}
        >
            <ChakraProvider>
                <Component {...pageProps} />
            </ChakraProvider>
        </Refine>
    );
}

Product Card Design with Chakra-UI
Let's design our product cards with Chakra-UI.
import React from "react";
import { Box, Image, Badge, Button } from "@chakra-ui/react";

export type ProductProps = {
    id: string;
    title: string;
    description: string;
    cardImage: string;
};

export const ProductCard: React.FC<ProductProps> = ({
    id,
    title,
    description,
    cardImage,
}) => {
    return (
        <Box maxH={"sm"} borderWidth="1px" borderRadius="lg" overflow="hidden">
            <Image w={"100%"} h={200} src={cardImage} />
            <Box p="6" bgColor={"gray.600"}>
                <Box display="flex" alignItems="baseline" mb={2} ml={-2}>
                    <Badge borderRadius="full" px="2" colorScheme="teal">
                        New Product
                    </Badge>
                </Box>

                <Box
                    mt="1"
                    fontWeight="semibold"
                    as="h4"
                    lineHeight="tight"
                    noOfLines={1}
                    color={"white"}
                >
                    {title}
                </Box>

                <Box color={"white"}>{}</Box>
                <Box
                    color="white"
                    fontSize="sm"
                    display={"flex"}
                    mt={4}
                    justifyContent={"flex-end"}
                ></Box>
            </Box>
        </Box>
    );
};
We created our Product Card component. Now let's move on to the process of fetch and showing our products from the Strapi.
Fetch Products with SSR
First, let's fetch our products with the nextjs getServerSideProps function.
GetServerSideProps
import { GetServerSideProps } from "next";
import { DataProvider } from "@refinedev/strapi-v4";

import { IProduct } from "interfaces";

const API_URL = "https://api.strapi-multi-tenant.refine.dev/api";

export const getServerSideProps: GetServerSideProps = async (context) => {
    const data = await DataProvider(API_URL).getList<IProduct>({
        resource: "products",
        meta: { populate: ["image"] },
    });

    return {
        props: { products: data },
    };
};
Create Product List with Refine
Let's process the data we fetch above using refine's useTable hook. Then let's put our data in our ProductCard component.
import { GetServerSideProps } from "next";
import { LayoutWrapper, GetListResponse, useTable } from "@refinedev/core";
import { DataProvider } from "@refinedev/strapi-v4";

import { IProduct } from "interfaces";
import { SimpleGrid } from "@chakra-ui/react";
import { ProductCard } from "src/components";

const API_URL = "https://api.strapi-multi-tenant.refine.dev/api";

type ItemProps = {
    products: GetListResponse<IProduct>;
};

export const ProductList: React.FC<ItemProps> = ({ products }) => {
    const { tableQueryResult } = useTable<IProduct>({
        resource: "products",
        queryOptions: {
            initialData: products,
        },
        meta: { populate: ["image"] },
    });

    return (
        <LayoutWrapper>
            <SimpleGrid columns={[1, 2, 3]} mt={6} spacing={3}>
                {tableQueryResult.data?.data.map((item) => (
                    <ProductCard
                        id={item.id}
                        title={item.title}
                        description={item.description}
                        cardImage={
                            item.image
                                ? API_URL + item.image.url
                                : "./error.png"
                        }
                    />
                ))}
            </SimpleGrid>
        </LayoutWrapper>
    );
};

export default ProductList;

export const getServerSideProps: GetServerSideProps = async (context) => {
    const data = await DataProvider(API_URL).getList<IProduct>({
        resource: "products",
        meta: { populate: ["image"] },
    });

    return {
        props: { products: data },
    };
};
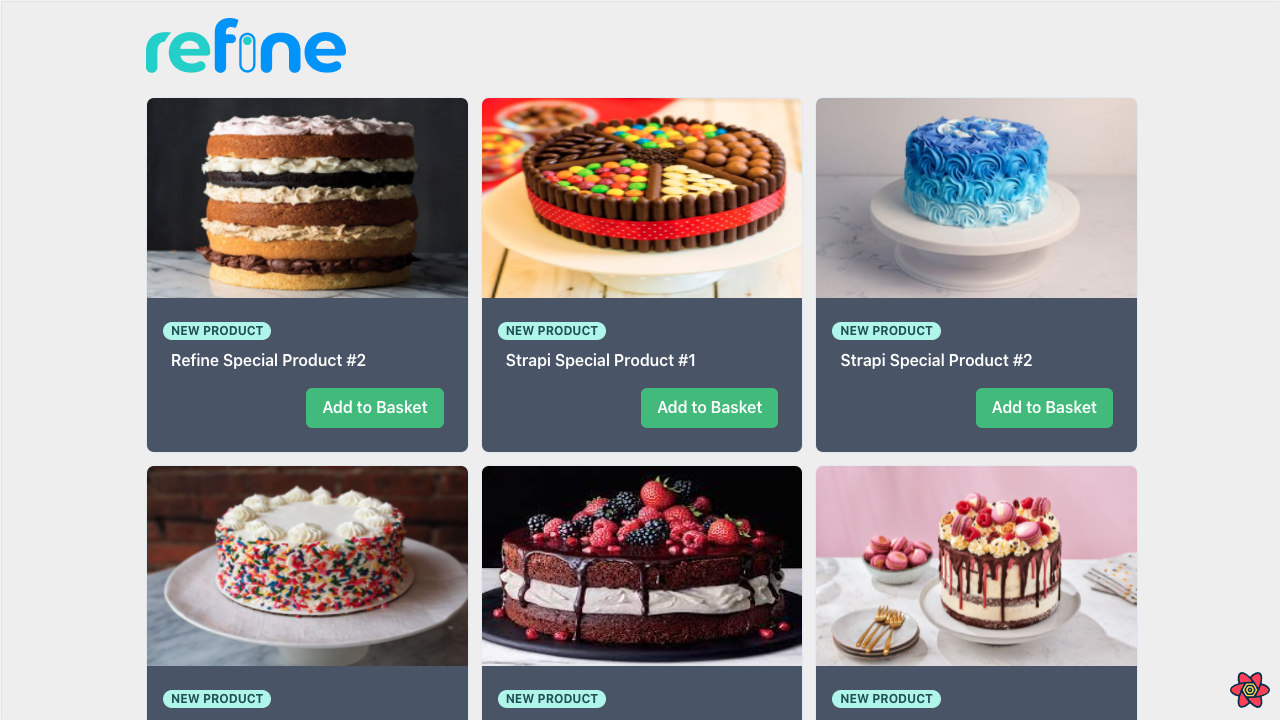
Adding Store-based Filtering
We have fetch all the products above. Now, let's fetch the stores and list the store-specific products separately.
First, let's fetch our stores by using the refine useMany hook within the getServerSideProps function. Next we will create buttons for the stores. When these buttons are clicked, a store is selected, we will do a filtering with useTable setFilters and list the products specific to that store.
export const getServerSideProps: GetServerSideProps = async (context) => {
    const data = await DataProvider(API_URL).getList<IProduct>({
        resource: "products",
        meta: { populate: ["image"] },
        pagination: { current: 1, pageSize: 9 },
    });

    const { data: storesData } = await DataProvider(API_URL).getMany({
        resource: "stores",
        ids: ["1", "2", "3"],
    });

    return {
        props: {
            products: data,
            stores: storesData,
        },
    };
};
import { GetServerSideProps } from "next";
import { LayoutWrapper, GetListResponse, useTable } from "@refinedev/core";
import { DataProvider } from "@refinedev/strapi-v4";

import { IProduct, IStore } from "interfaces";
import { Button, SimpleGrid, Flex, Text } from "@chakra-ui/react";
import { ProductCard, FilterButton } from "src/components";

const API_URL = "https://api.strapi-multi-tenant.refine.dev/api";

type ItemProps = {
    products: GetListResponse<IProduct>;
    stores: IStore[];
};

export const ProductList: React.FC<ItemProps> = ({ products, stores }) => {
    const { tableQueryResult, setFilters } = useTable<IProduct>({
        resource: "products",
        queryOptions: {
            initialData: products,
        },
        meta: { populate: ["image"] },
    });

    return (
        <LayoutWrapper>
            <Flex mt={6} gap={2}>
                <FilterButton
                    setFilters={() =>
                        setFilters([
                            {
                                field: "stores][id]",
                                operator: "eq",
                                value: undefined,
                            },
                        ])
                    }
                >
                    <Text fontSize={{ base: "12px", md: "14px", lg: "14px" }}>
                        All Products
                    </Text>
                </FilterButton>
                {stores?.map((item) => {
                    return (
                        <FilterButton
                            setFilters={() =>
                                setFilters([
                                    {
                                        field: "stores][id]",
                                        operator: "eq",
                                        value: item.id,
                                    },
                                ])
                            }
                        >
                            <Text
                                fontSize={{
                                    base: "12px",
                                    md: "14px",
                                    lg: "14px",
                                }}
                            >
                                {item.title}
                            </Text>
                        </FilterButton>
                    );
                })}
            </Flex>
            <SimpleGrid columns={[1, 2, 3]} mt={6} spacing={3}>
                {tableQueryResult.data?.data.map((item) => (
                    <ProductCard
                        id={item.id}
                        title={item.title}
                        description={item.description}
                        cardImage={
                            item.image
                                ? API_URL + item.image.url
                                : "./error.png"
                        }
                    />
                ))}
            </SimpleGrid>
        </LayoutWrapper>
    );
};

export default ProductList;

export const getServerSideProps: GetServerSideProps = async (context) => {
    const data = await DataProvider(API_URL).getList<IProduct>({
        resource: "products",
        meta: { populate: ["image"] },
        pagination: { current: 1, pageSize: 9 },
    });

    const { data: storesData } = await DataProvider(API_URL).getMany({
        resource: "stores",
        ids: ["1", "2", "3"],
    });

    return {
        props: {
            products: data,
            stores: storesData,
        },
    };
};
Adding Pagination
We list all products on our All Products page. Let's add pagination to this page and divide the products into pages. We will perform pagination using the pageSize, current and setCurrent properties from the useTable hook.
Refer to the useTable documentation for detailed information. →
import { GetServerSideProps } from "next";
import { LayoutWrapper, GetListResponse, useTable } from "@refinedev/core";
import { DataProvider } from "@refinedev/strapi-v4";

import { IProduct, IStore } from "interfaces";
import { Button, SimpleGrid, Flex, Text } from "@chakra-ui/react";
import { ProductCard, FilterButton } from "src/components";

const API_URL = "https://api.strapi-multi-tenant.refine.dev/api";

type ItemProps = {
    products: GetListResponse<IProduct>;
    stores: IStore[];
};

export const ProductList: React.FC<ItemProps> = ({ products, stores }) => {
    const { tableQueryResult, setFilters, current, setCurrent, pageSize } =
        useTable<IProduct>({
            resource: "products",
            queryOptions: {
                initialData: products,
            },
            initialPageSize: 9,
            meta: { populate: ["image"] },
        });

    const totalPageCount = Math.ceil(tableQueryResult.data?.total!! / pageSize);

    return (
        <LayoutWrapper>
            <Flex mt={6} gap={2}>
                <FilterButton
                    setFilters={() =>
                        setFilters([
                            {
                                field: "stores][id]",
                                operator: "eq",
                                value: undefined,
                            },
                        ])
                    }
                >
                    <Text fontSize={{ base: "12px", md: "14px", lg: "14px" }}>
                        All Products
                    </Text>
                </FilterButton>
                {stores?.map((item) => {
                    return (
                        <FilterButton
                            setFilters={() =>
                                setFilters([
                                    {
                                        field: "stores][id]",
                                        operator: "eq",
                                        value: item.id,
                                    },
                                ])
                            }
                        >
                            <Text
                                fontSize={{
                                    base: "12px",
                                    md: "14px",
                                    lg: "14px",
                                }}
                            >
                                {item.title}
                            </Text>
                        </FilterButton>
                    );
                })}
            </Flex>
            <SimpleGrid columns={[1, 2, 3]} mt={6} spacing={3}>
                {tableQueryResult.data?.data.map((item) => (
                    <ProductCard
                        id={item.id}
                        title={item.title}
                        description={item.description}
                        cardImage={
                            item.image
                                ? API_URL + item.image.url
                                : "./error.png"
                        }
                    />
                ))}
            </SimpleGrid>
            <Flex justify={"flex-end"} mt={4} mb={4} gap={2}>
                {Array.from(Array(totalPageCount), (e, i) => {
                    if (current > totalPageCount) {
                        setCurrent(i);
                    }
                    return (
                        <Button
                            colorScheme={"teal"}
                            onClick={() => setCurrent(i + 1)}
                        >
                            {"Page: " + (i + 1)}
                        </Button>
                    );
                })}
            </Flex>
        </LayoutWrapper>
    );
};

export default ProductList;

export const getServerSideProps: GetServerSideProps = async (context) => {
    const data = await DataProvider(API_URL).getList<IProduct>({
        resource: "products",
        meta: { populate: ["image"] },
        pagination: { current: 1, pageSize: 9 },
    });

    const { data: storesData } = await DataProvider(API_URL).getMany({
        resource: "stores",
        ids: ["1", "2", "3"],
    });

    return {
        props: { products: data, stores: storesData },
    };
};
Adding Basket and Payment features with Snipcart
One of the steps that should be in an E-commerce application is the cart and payment transactions. In our example, we will use Snipcart for this process.
Refer to the Snipcart documentation for detailed information. →
Installation Snipcart Widget
function MyApp({ Component, pageProps }: AppProps): JSX.Element {
    const dataProvider = DataProvider(API_URL);

    return (
        <>
            <Head>
                <link rel="preconnect" href="https://app.snipcart.com" />
                <link
                    rel="stylesheet"
                    href="https://cdn.snipcart.com/themes/v3.0.16/default/snipcart.css"
                />
                <script
                    async
                    src="https://cdn.snipcart.com/themes/v3.0.16/default/snipcart.js"
                />
            </Head>
            <Refine
                routerProvider={routerProvider}
                dataProvider={dataProvider}
                resources={[{ name: "products" }]}
                Layout={Layout}
            >
                <ChakraProvider>
                    <Component {...pageProps} />
                </ChakraProvider>
            </Refine>
            <div hidden id="snipcart" data-api-key="YOUR_SNIPCART_TEST_KEY" />
        </>
    );
}
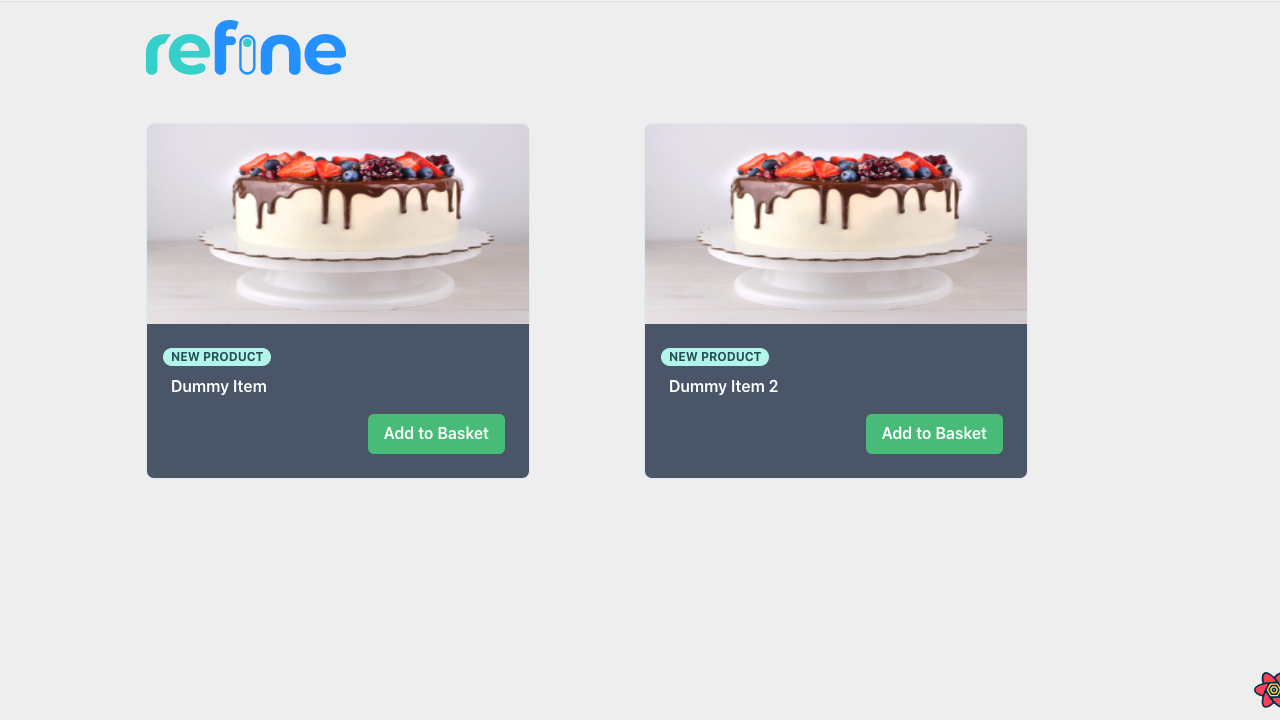
Adding "Add to Basket" Button on ProductCard component
import React from "react";
import { Box, Image, Badge, Button } from "@chakra-ui/react";

export type ProductProps = {
    id: string;
    title: string;
    description: string;
    cardImage: string;
};

export const ProductCard: React.FC<ProductProps> = ({
    id,
    title,
    description,
    cardImage,
}) => {
    return (
        <Box
            maxH={"sm"}
            maxW="sm"
            borderWidth="1px"
            borderRadius="lg"
            overflow="hidden"
        >
            <Image w={"100%"} h={200} src={cardImage} />
            <Box p="6" bgColor={"gray.600"}>
                <Box display="flex" alignItems="baseline" mb={2} ml={-2}>
                    <Badge borderRadius="full" px="2" colorScheme="teal">
                        New Product
                    </Badge>
                </Box>

                <Box
                    mt="1"
                    fontWeight="semibold"
                    as="h4"
                    lineHeight="tight"
                    noOfLines={1}
                    color={"white"}
                >
                    {title}
                </Box>
                <Box
                    color="white"
                    fontSize="sm"
                    display={"flex"}
                    mt={4}
                    justifyContent={"flex-end"}
                >
                    <Button
                        className="buy-button snipcart-add-item"
                        bgColor={"green.400"}
                        data-item-id={id}
                        data-item-price="5"
                        data-item-url="/"
                        data-item-name={title}
                        data-item-description={description}
                        data-item-image={cardImage}
                    >
                        Add to Basket
                    </Button>
                </Box>
            </Box>
        </Box>
    );
};
Conclusion
One of the biggest features that distinguishes refine from other frameworks is that it is customizable. Combined with refine headless, it now provides more customization options. This provides a great deal of convenience in the project you will develop.
As you can see in this article, we have developed the Client part of our Admin Panel, which we have done before, with refine. refine offers the opportunity to develop B2B and B2C applications without any restrictions and in a fully customizable manner.
Refer to the Admin side of the project →